
This post is going to cover a really specific piece of gear, but one I feel is essential to your lightweight travel kit. The often overlooked, monopod. I just returned from a trip to Ireland and Northern Ireland and the day before I left, I purchased a Benro A48FD Monopod for the trip. I kind of decided at the last minute to do that as I already had one, but knowing the pictures I was going to be taking, I felt I needed an upgrade, especially for a “bucket list” trip.
As most readers of this blog know, I purchased a Sony RX100M6 last year and I even did a review of it. What is really special about this little beast of a camera is that it takes some really good travel photos and also adds 4K video shooting that looks really, really good, especially when you have any of their SLOG picture profiles selected. SLOG is Sony’s log profile for video shooters that allows you to grade your footage in post. As long as you don’t get too crazy with the grade, the footage turns out well. You can also shoot photos in a picture profile as well that gives you greater control over dynamic range.
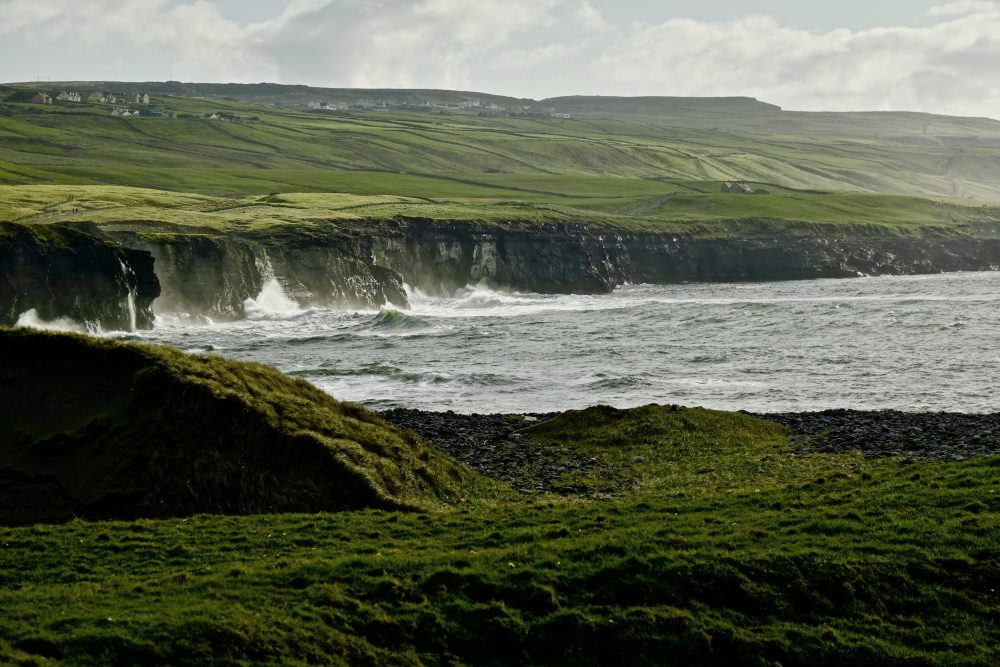
These days, an aspect of photography that I am currently exploring is HDR photography. HDR, or “High Dynamic Range” photography is a technique where you are trying to cover the areas of a photo that are from the very darkest, to the very brightest. These types of photos are made by exposure bracketing anywhere from 5-9 shots, and then combining them into one photograph. Current digital cameras are getting very good, but getting a very wide dynamic range in one snap of the shutter is still a tall task for any camera these days. These types of photos are particularly popular in real estate photography and they can translate very well into architectural photos of historical sites, whether they are indoor or outdoor scenes. Having never been to Ireland and Northern Ireland, I knew that there would be a ton of opportunities to grab some pretty amazing HDR photos. As always though, there are tradeoffs and in regard to HDR, the biggest tradeoff is your time in post processing. If your processing just a few photos, no big deal, but if you’ve been to a place like Ireland, or Northern Ireland, you will likely come back with a ton of photos to process. This is basically what I am dealing with right now, in fact.
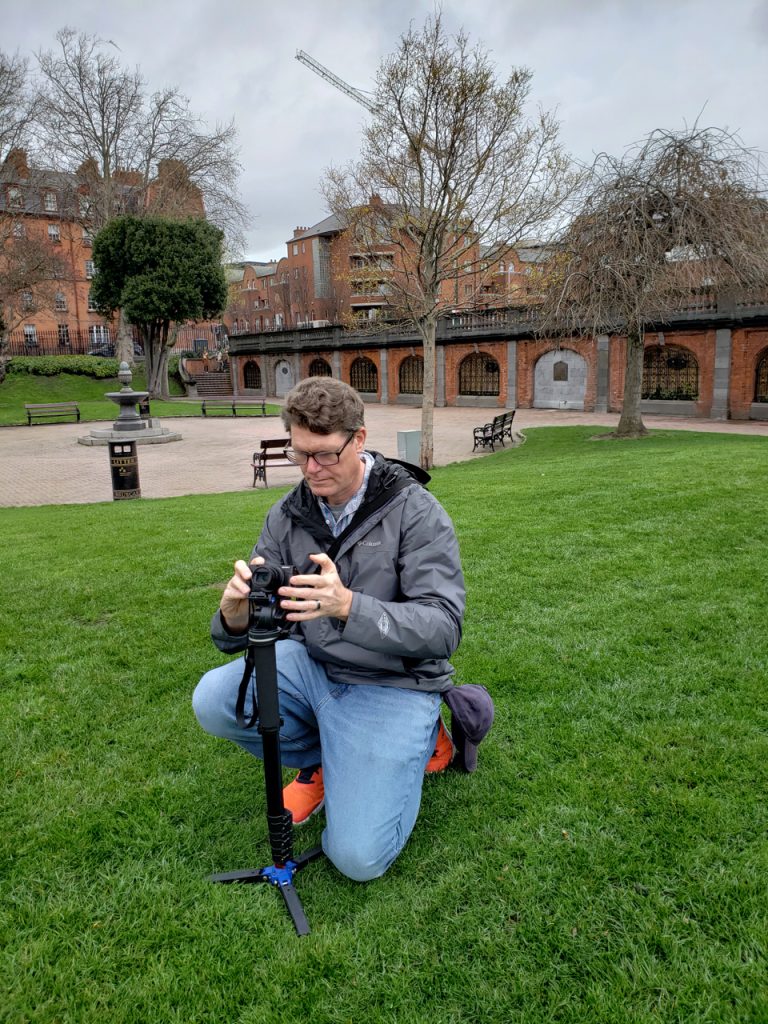
The day before I left on the plane, I headed over to George’s Camera in Kearny Mesa and basically looked at three different monopods. After testing and trying out different brands, I settled on the Benro A48FD, it was a good middle choice between features and weight. I already have a small Benro S2 video head, as well as a Benro tripod as the main sticks for my A camera, so I am definitely familiar with them as a brand and their products. They usually strike a good balance with their products between the features that they offer and their price point and the monopod that I purchased strikes that balance. The main features that I was looking for were fold out “legs” at the bottom, light weight, and also a way to adjust the monopod where you can compensate for a bit of change in the slope of the ground. This pod offered all that plus a nice foam grip, a carrying strap, legs that have a snap bracket and not a twisting bracket, and an overall solid construction.
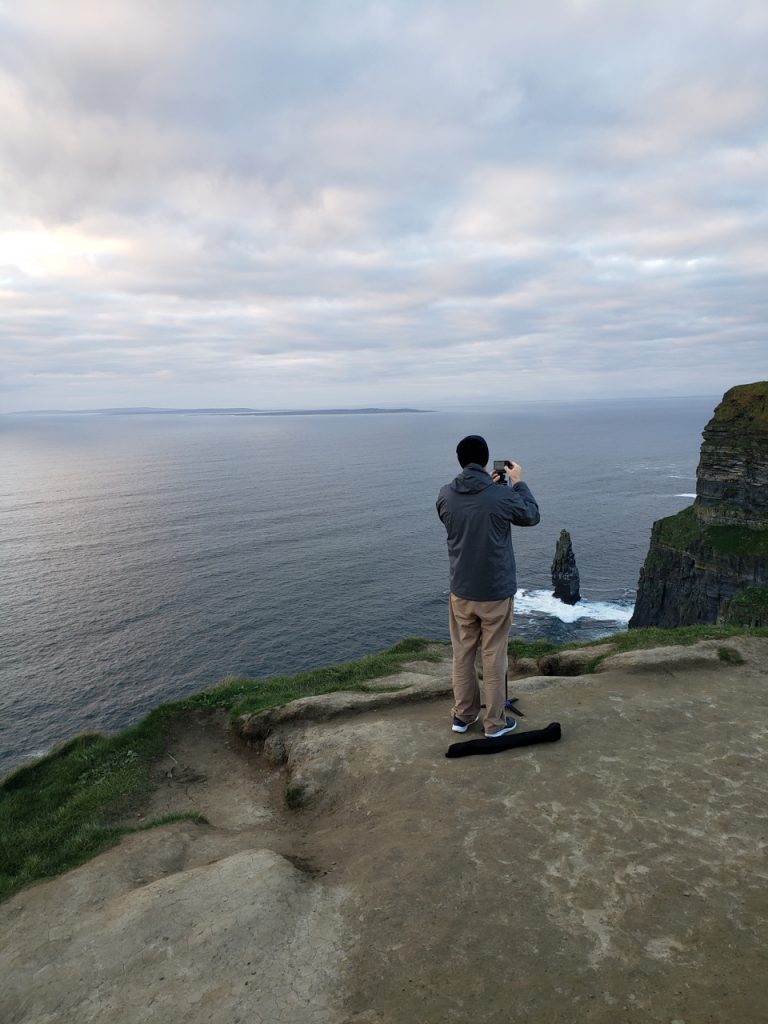
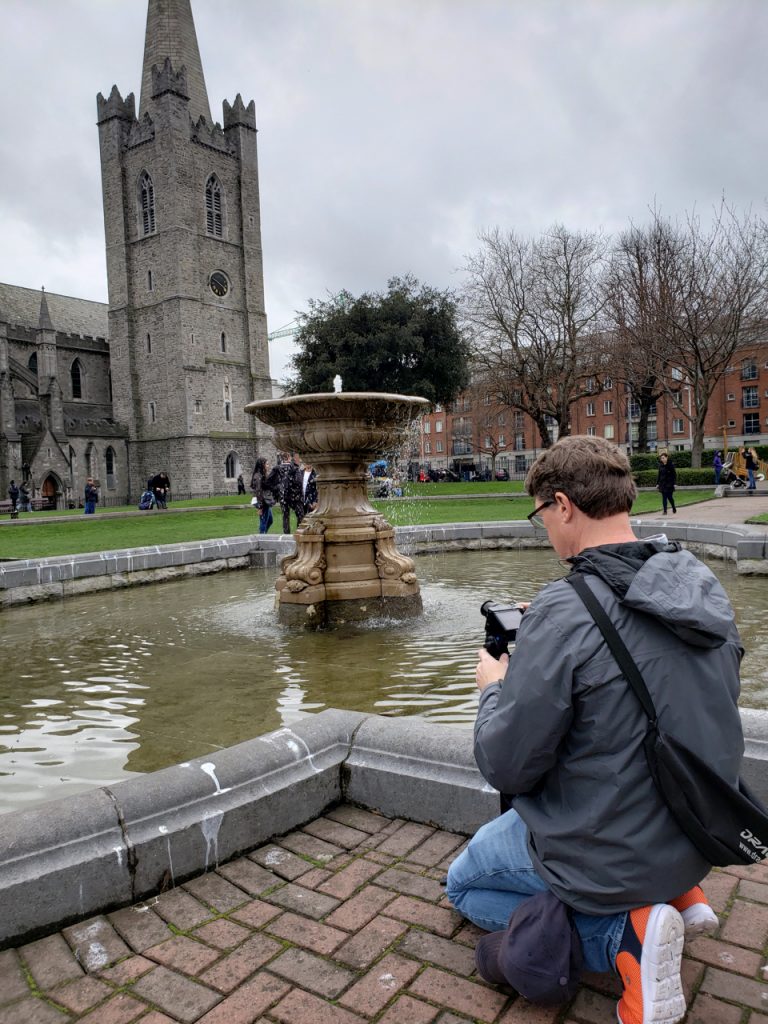
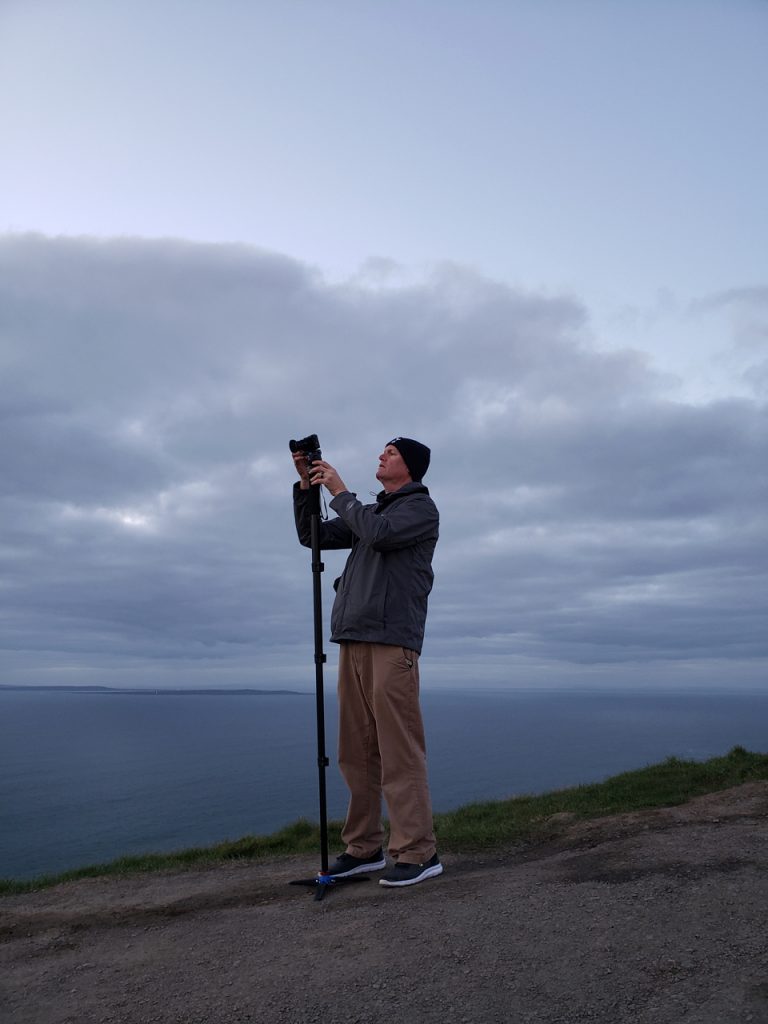
In addition to using it as a standing pod, I also used it to take photos over the edge of a cliff, looking straight down. Basically, I crawled on my hands and knees about three feet from the edge, pre-focused the lens, set the self-timer on the camera and eased the pod out over the edge. Calculated risk, but for the most part, it worked and it gave a unique perspective that I would not have been able to get had I not had the pod with me. Having it with me also allowed me the opportunity to take some longer exposure photography, especially when dusk was settling in. The only caveat with using it for long shutter times, or for HDR photography is that you really need the monopod to be settled down and rock solid. Especially when there was a bit of wind, I found that it would sway a bit when it was extended to its fullest, which is about six feet. What helped me out when I needed to take a specialized photo, was that I dropped it a section and also set the timer on the camera, to give the pod time to settle down.
So in summary here are my 6 tips for using a monopod, in no particular order.
- Get yourself a slightly larger carrying bag. I use a light stand bag and it’s able to fit the monopod and also the head I have attached. The benro supplied bag it comes with will only be able to fit the pod.
- Let the monopod settle down and stop swaying when extended. For long exposure and HDR type photos, set your camera on a slight delay to give your camera time to settle up once you press the shutter button on your camera so you can get the sharpest photo(s) possible.
- Use the monopod to get unique angles. I set the pod over a cliff edge, and I also used it to take an elevated photo from about 12 feet in the air (I’m 6’ tall already with long arms)
- When using the monopod fully extended, be aware that any attached straps will catch the wind and cause the pod to sway. This includes shooting video as well. I just held the straps up and to the side to minimize that problem.
- Get a monopod that’s lightweight but sturdy. If you are traveling around, most likely you will be getting out and doing quite a bit of walking. You need to take this into account because after carrying it around a city, it can really start taxing you.
- Be aware that many museums and buildings do not allow you to bring tripods or monopods with you while you tour their facility. Having a monopod on the smaller side will help out when you need to store it in a locker.
So there you have it, my tips for using a monopod. If you don’t have one for traveling, I highly encourage you to do your research and pick one up. I would not have been able to get some of the photos in Ireland and Northern Ireland without using one.
Slán, (goodbye in Irish)
Chris
Recent Comments